The beauty of shibari as a means of bondage is in the simplicity (it is actually really simple, which is why I like it).
But unless someone shows you how to do some of the awesome, foreign, amazing looking twists and turns, then it’s harder to pick up and your confidence won’t be great when it comes to “doing it right”.
So here are a few very simple tricks which will seriously improve the look and function of your bondage, and also significantly help with confidence and general skill level.
Trick No. 1: The Munter Hitch

No words can describe my enthusiasm for this simple, effective twist of rope.
You can do SO MANY THINGS with it. For example, in the pics in this post, I’m using it on a leg tie (which I’ll show how to do in an upcoming post). And I’m making that leg tie look fucking cool, while at the same time locking off my tension with that hitch. Form AND function!
It’s so beautiful! I’ve also used it recently when finishing the more decorative parts of a harness; using it to lock rope and tension into place at intersections is pretty much what this beautiful hitch is for, in addition to looking seriously cool.
So, I’m going to show you exactly how I do it.
(Which will also shortcut some of the learning for the leg tie tutorial I’m going to do in a future post – by dwelling at length on these tricks, you’ll already have them in your arsenal when it comes to learning new things)
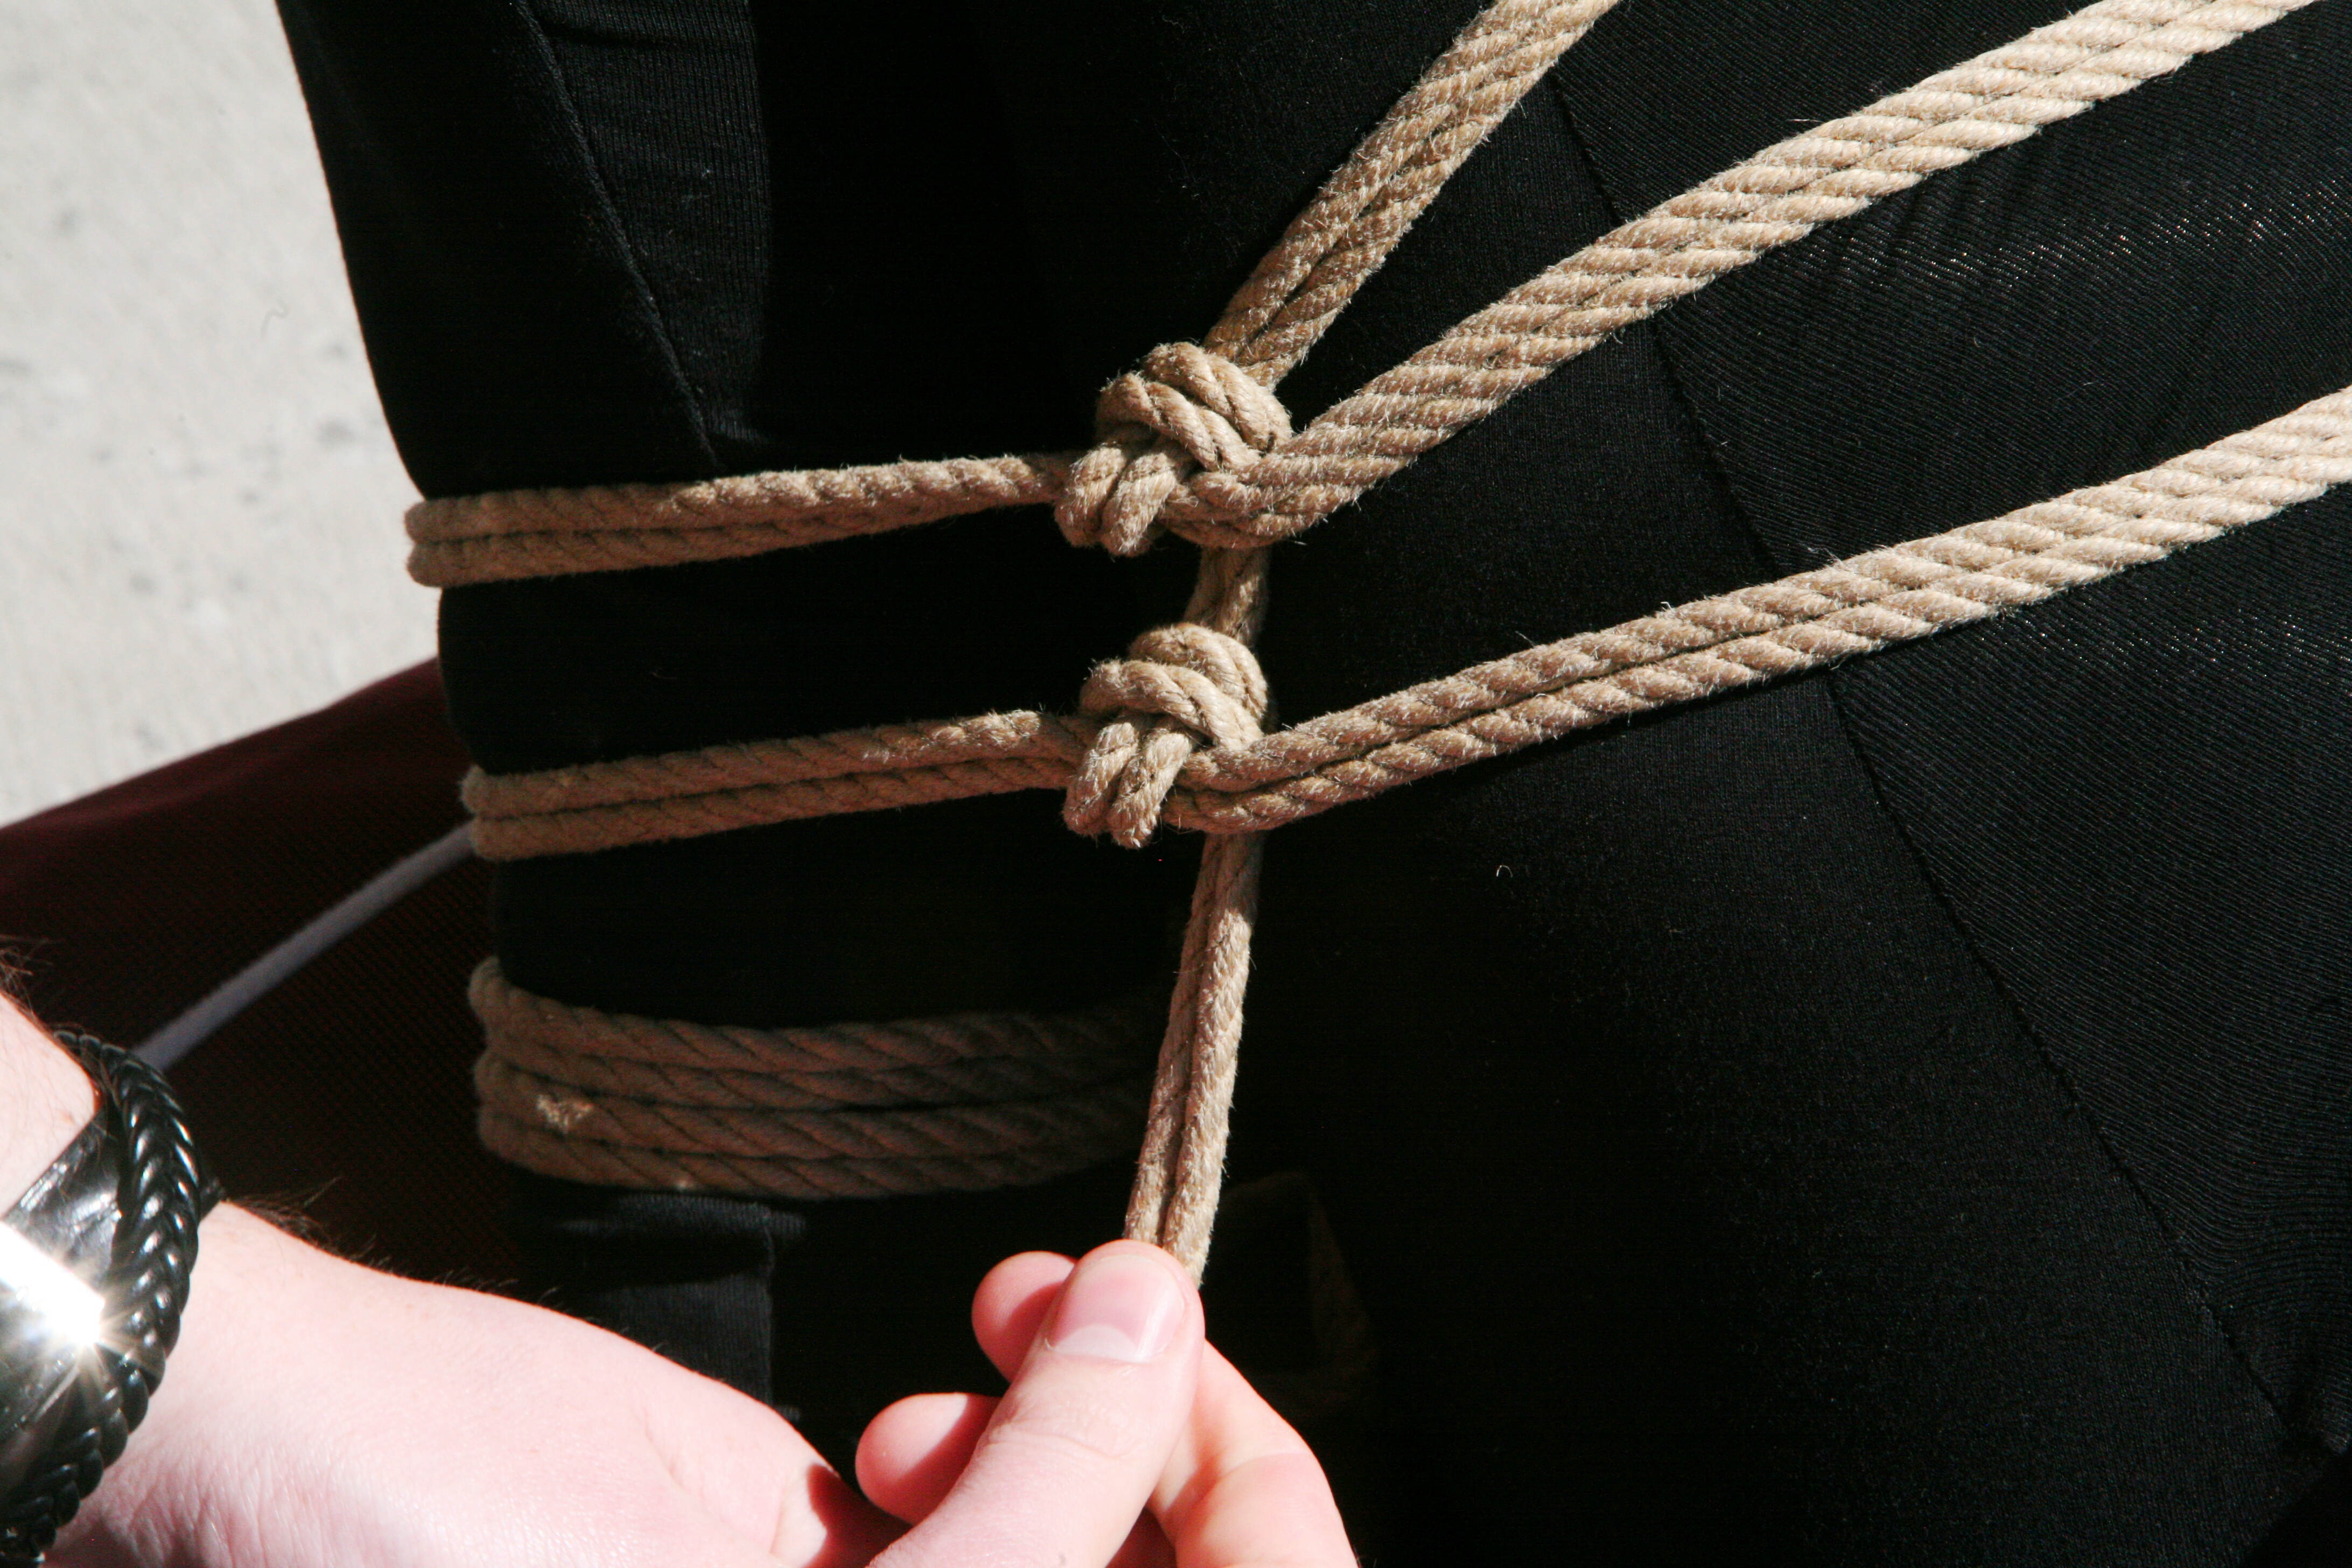
Okay, in this next picture, I want you to focus on the second horizontal band of rope, below the top one and the Munter Hitch I’ve already done. You’ll note that the rope travels downward OVER the band. That’s important.

You then hook the rope beneath the band

You then pull the rope at right angles across the vertical strand

before travelling down again beneath the horizontal band.
And that’s an additional completed Munter Hitch.

You’ll note that when you do them in rows like these, they look really freaking awesome. You can also be sure that your tension is locked off between each individual band.
Pro-tip: A Munter Hitch works best when it’s travelling in a straight line from where the rope was coming from. In this instance, the line is more or less directly downward. If I had tried to move the rope off to the right in these pictures, the hitch would have slipped and fallen apart, and my rope would not be fixed in place. It’s a very directionally based kind of hitch.
Next, after learning the Munter Hitch, this is the perfect opportunity for you to learn the Cow Hitch, because it uses the Munter in its construction.
Trick No.2: The Cow Hitch
Behold: A Cow Hitch.

Now, what this thing is good for is once again, locking off tension. The difference is that a Munter Hitch is sort of an intermediate hitch; it locks off tension midway through a tie; whereas a Cow Hitch locks off tension in a more final way, and also closes in on itself enough that you can use it in place of a knot to finish off a tie.
Which is exactly what I tend to use it for; finishing off a tie in such a way that I can easily open things up and start undoing it whenever I like.
It doesn’t hurt that it keeps that lovely, shibari-like simplicity, either. It’s a wonderful aesthetic.
So let’s say you’re getting close to finishing your tie. What you need to do now is create another Munter Hitch.

After you’ve created your Munter Hitch, you need to back up a stage and pull that bottom loop back open a bit.

Then you take your working end (loose end of rope, I should really create a glossary at some point) and run it back down through the loop.

Then you just tighten the loop down again. It’ll pinch closed on your working end, and should create a nice finish to your tie. Boom, a completed Cow Hitch.
Ideally, you’ll do this at a time when you have little rope left, and then you can tuck away any trailing ends behind your wraps for a nice finish.
Trick No.3: Finger Hooking Technique
And last, but most definitely not least of all three tricks….
Go back up and look at the photos of how to do the Munter Hitch. Take careful note of how I’m using my finger.
In each instance, I’m putting my finger through from the other side of where I want my rope to go, and I’m hooking it through.
Practice that. Practice that at every opportunity. Practice it slowly at first, and keep on doing it until it becomes second nature.
That one, single trick will make your tying skills about 5x faster, smoother, and more efficient.
That is probably the most useful thing you can learn to really boost your confidence when it comes to the tying process itself. It will make the whole process just flow, and add far, far more enjoyment to the whole thing, both for you, and whoever you’re tying.
I hope everyone finds this useful! These are three of the things that have made my own rope bondage a lot more fun and enjoyable, and I’ve really enjoyed sharing them with you.
If you found this post useful, and you would like to be notified of new posts of similar or more usefulness, then subscribe to the blog by entering your email address in the field at the top right of the sidebar.
Happy tying!
These photos were taken by CBT42, a very cool erotic photographer I’m lucky to know.

