The secondary column tie is a core part of the rope bondage curriculum, right after the single column tie and the two column tie. It’s essential if you want to solve a lot of rope bondage problems in the safest way possible.
Let’s say you’ve tied a single column tie to someone’s wrist; now you want to tie another one on the other wrist.
You go to tie it on, and then you realize that because one end of your rope is already in use on the first wrist, you can’t actually form a safe column tie using the same method you did in the first place.
That’s frustrating – and scary, because often you’ll feel tempted to try and get away with it anyway. You want your plan to work!
The same issue exists for single column tie to ankle, or just to most other places where you’re going to want another column tie. This is exactly WHY you need a secondary column tie, which is not going to tighten down in bad ways.
I recently (in the last six months) came across another great resource for technical skills with rope bondage; and that’s Topologist’s site, Crash Restraint. Topologist does some great work addressing safety issues and making use of half hitches to solve all kinds of issues (Seriously, he’s a bigger half hitch fanboy than I am, and that’s impressive).
So I learned the below method from him – and all credit goes to him for it.
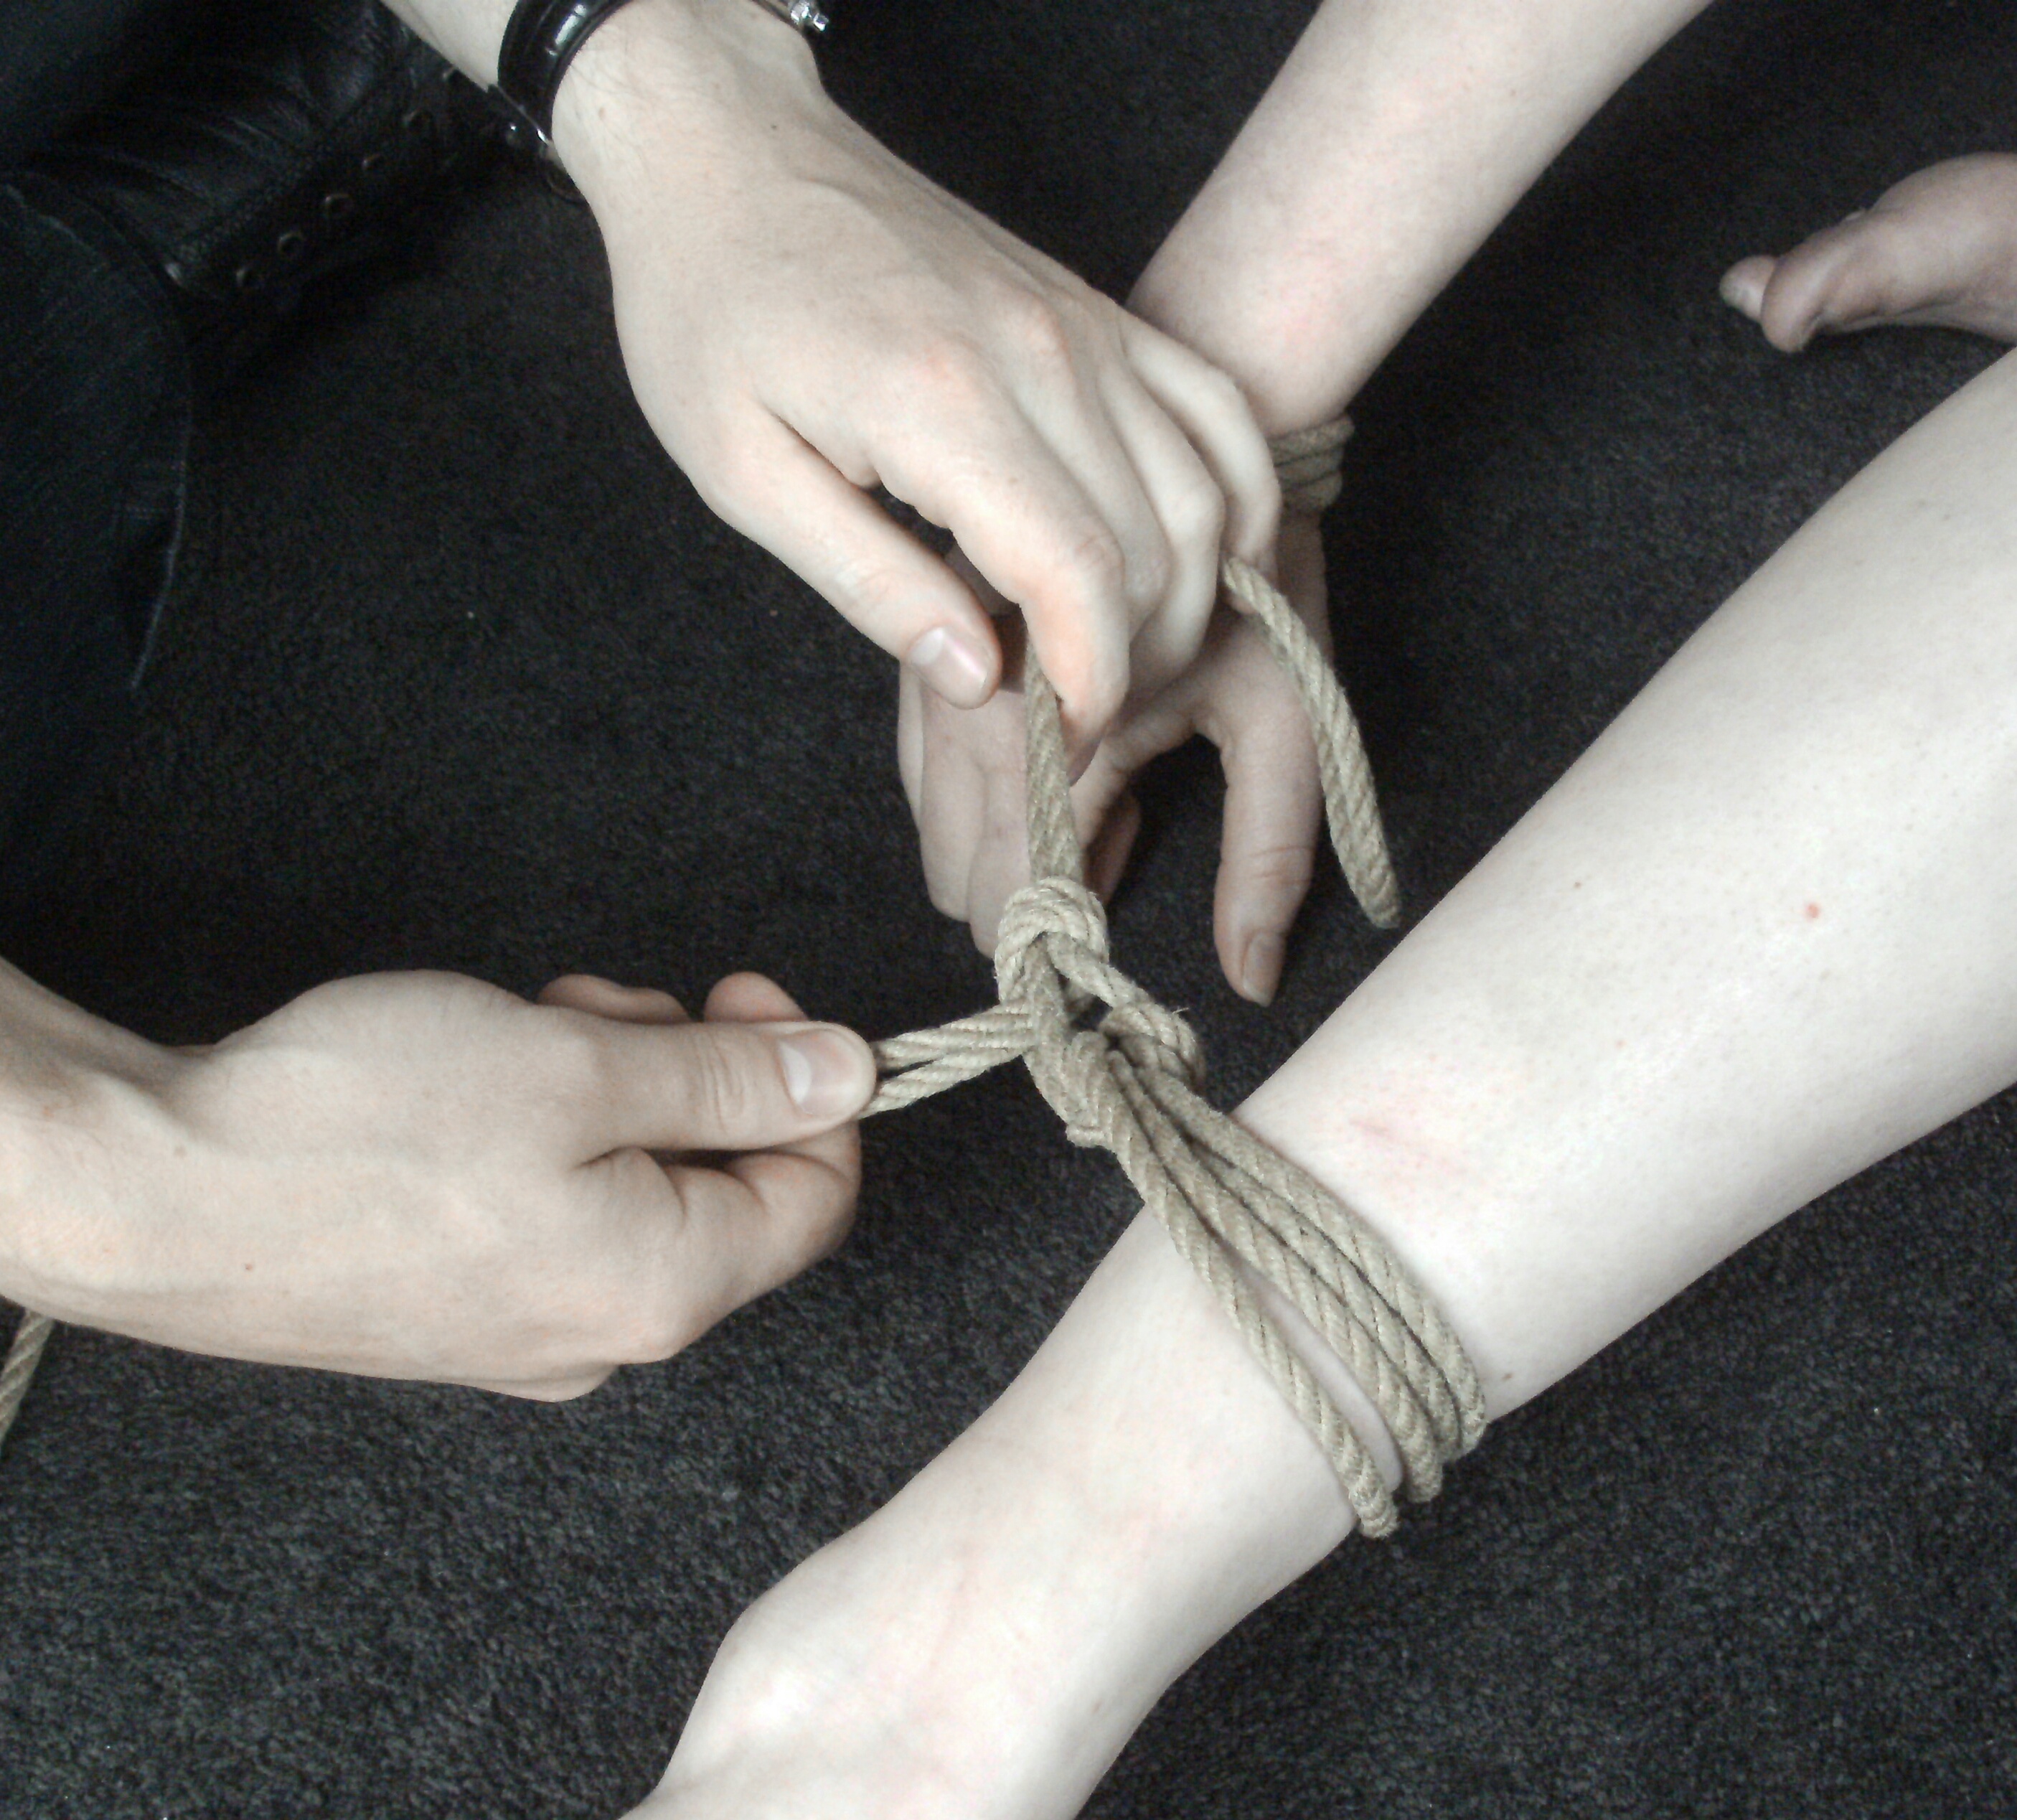
How To Do The Tie
For this example, I’m using wrist to ankle.
So you’ve attached some kind of single column tie to a wrist, using your awesome doubled rope shibari-ish technique.
Now comes something kind of counter-intuitive; you’re now going to split your doubled rope, and create a half hitch in it, as below.

If you need further detail, here’s another picture on how that’s done.

The reason why we’re doing this is that we need to create a kind of barrier, that’s going to prevent rope from tightening down in an untoward manner on the person we’re tying. You can get nerve damage and circulation issues that way.
So we’re using the magical half hitch as the first component of that barrier; because half hitches exploit friction amazingly, and that’s really useful for locking your rope in place.
So you set the half hitch against the limb, pretty much exactly where you want the rope to stop tightening down, and then continue wrapping over the limb.

When you bring the rope up again, you bring it up just above the half hitch, between your split strands. You can do this about twice; if you want to add a third wrap, you want to do that outside of the half hitch and split strands, because otherwise you’re just not going to be able to have even tension across all three wraps of your new band.
It’s okay, really. You’ll see in a minute.
So in this below picture, I’ve created a simple two wrap band, and brought the working end of my rope up back through the split one last time. I am not about to form another wrap over the limb.

What I’m doing instead, is using my working end to add the second part of my barrier; the rope that goes beneath my band and locks against the half hitch to prevent the band from tightening down. (This is also why I said it doesn’t matter if your third wrap is outside the third rope; because this “barrier wrap” is going to lock it against the half hitch anyway.)

The key thing about this “barrier wrap” of rope is that the tension on both sides is even. This prevents it from slipping down.

In order to do that, I’m going to create another half hitch, this time using my doubled working end, over that split strand of rope. I’m going to bring the working end up through the inside of the loop, so that I can then close the hitch on itself.

So once you snug this up against the hitch and those wraps, the rope then pinches down on the band, instead of the limb. You’re then free to start using your working end to tie elsewhere, without fear of this band tightening down and causing problems. Your secondary column tie is complete.

At this point, you’re in a great position to create a leg tie or do something else if you like.
Fun fact, depending on what direction you go when you make your final locking half hitch, you can have your working end aiming upward or downward – which is useful to bear in mind for if you’re planning to build your ties in a particular direction.
This whole thing has made me feel a lot safer about my tying; it means I have additional options when I want to add more cuffs or restriction etc. I was really freaking pleased to learn it, because it had bothered me a lot that I had no safe way of doing additional columns in a safe way.
Now, the secondary column tie takes practice, and also takes a good thirty seconds or so to tie. But with practice, it’s more fluid, and you’ll get faster at doing it.
In my opinion, the safety factor is worth the extra seconds.
Thank you to both Davion and 32Bit for assisting with the creation of this tutorial; 32Bit for being my model, and Davion for taking the photos.

